Valentine Cake Pops: A Sweet Treat to Celebrate Love
Valentine’s Day is all about expressing love and affection, and what better way to do that than with a delicious homemade treat? Valentine cake pops are the perfect blend of sweetness and creativity, making them an ideal gift or dessert for your loved ones. In this article, we’ll dive deep into everything you need to know about these charming confections, from what they are to how you can make them at home.
Table of Contents
What Are Valentine Cake Pops?

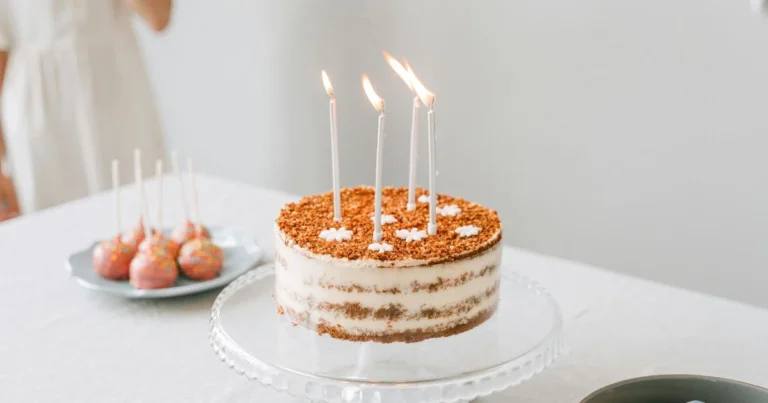
Cake pops are bite-sized pieces of cake shaped into a ball, coated with chocolate or candy melts, and placed on a stick—much like a lollipop. Valentine cake pops take this idea to the next level by incorporating Valentine’s Day themes, such as heart shapes, red and pink colors, and romantic decorations.
These delightful treats combine the moistness of cake with the crunch of a candy shell, offering a perfect balance of textures and flavors. They’re not only delicious but also visually appealing, making them a popular choice for Valentine’s Day celebrations.
Why Valentine Cake Pops Are the Perfect Gift
Personal Touch
In a world full of store-bought chocolates and generic gifts, a homemade treat like valentine cake pops adds a personal touch that speaks volumes. Crafting these confections yourself shows that you’ve invested time and effort, making your gift more meaningful.
Easy to Make and Customize
One of the best things about cake pops is their versatility. You can choose your preferred cake flavor, frosting, and decorations to suit the taste of your special someone. Whether they love classic vanilla or decadent chocolate, there’s a cake pop for everyone.
How to Make Valentine Cake Pops at Home
Making valentine cake pops at home is simpler than you might think. Follow this step-by-step guide to create your own batch of these lovely treats.
Ingredients Needed
- For the Cake:
- 1 box of cake mix (any flavor)
- Ingredients as per the cake mix instructions (eggs, oil, water)
- For the Frosting:
- 1 tub of frosting (matching the cake flavor)
- For the Coating:
- Candy melts in red, pink, and white colors
- For Decoration:
- Sprinkles, edible glitter, heart-shaped candies
- Other Supplies:
- Lollipop sticks
- Styrofoam block or cake pop stand
- Wax paper
Step-by-Step Instructions
1. Bake the Cake
Prepare the cake mix according to the package instructions. Once baked, allow the cake to cool completely.
2. Crumble the Cake
In a large bowl, crumble the cooled cake into fine pieces. Ensure there are no large chunks left.
3. Mix in the Frosting
Add a spoonful of frosting to the crumbled cake. Mix well until the texture resembles cookie dough. The mixture should be moist enough to hold its shape when formed into a ball.
4. Form the Cake Balls
Using a tablespoon or a cake pop scoop, portion out the mixture and roll it into balls. For a Valentine’s twist, consider shaping some into hearts. Place them on a wax paper-lined tray.
5. Insert the Sticks
Melt a small amount of candy melts in a bowl. Dip the tip of each lollipop stick into the melted candy and insert it halfway into each cake ball. This helps secure the stick to the cake pop.
6. Chill the Cake Pops
Place the cake pops in the refrigerator for at least 30 minutes or in the freezer for 15 minutes. They should be firm but not frozen.
7. Prepare the Coating
Melt the candy melts according to the package instructions. Use separate bowls for each color. If the candy melts are too thick, add a teaspoon of vegetable shortening to thin it out.
8. Dip the Cake Pops
Remove the cake pops from the fridge. Dip each one into the melted candy coating, ensuring it’s fully covered. Gently tap off any excess coating.
9. Decorate
While the coating is still wet, sprinkle your chosen decorations over the cake pop. Get creative with different designs for a personalized touch.
10. Let Them Set
Stick the cake pops into a Styrofoam block or cake pop stand to dry completely. Once set, they’re ready to be enjoyed or packaged as gifts.
Decorating Ideas for Valentine Cake Pops
Chocolate Coating Options
- Marbled Effect: Swirl two colors of melted candy melts together for a marbled look.
- Drizzles: After the base coating has set, use a contrasting color to drizzle over the cake pops for an artistic touch.

Creative Toppings and Sprinkles
- Heart Sprinkles: Perfect for the Valentine theme.
- Edible Glitter: Adds a sparkling effect that catches the eye.
- Personalized Messages: Use edible markers to write short messages on larger, flat-shaped cake pops.
Tips for Perfect Valentine Cake Pops
Common Mistakes to Avoid
- Over-Mixing the Frosting: Adding too much frosting can make the cake pops too soft and prone to falling apart.
- Rushing the Chilling Process: Skipping the chilling step can result in cake pops that fall off the stick during dipping.
Storage and Presentation
- Storage: Keep the cake pops in an airtight container at room temperature for up to a week.
- Presentation: Wrap individual cake pops in cellophane bags tied with a ribbon, or arrange them in a decorative vase like a bouquet.
Where to Buy Valentine Cake Pops
If you’re short on time or prefer purchasing them, many bakeries and online shops offer beautifully crafted valentine cake pops. Look for local artisans who use quality ingredients for the best taste and presentation.
Conclusion
Valentine cake pops are a delightful way to celebrate love and affection. Whether you’re making them for a romantic partner, friends, or family, these sweet treats are sure to bring a smile to anyone’s face. With this comprehensive guide, you’re now equipped to create your own batch of delicious and beautiful cake pops that capture the spirit of Valentine’s Day.
For more inspiration and recipes, visit Food Network’s Cake Pop Recipes.